- Introduction To Smartphone Video Techniques
- Using A Smartphone For Video Recording
- Techniques to Master Smartphone Videography
- Understanding Your Smartphone Video Filming Capabilities
- In Conclusion
- Optimal Lighting is Key For Smartphone Videography
- Stabilization Improves Your Video Quality
- Exploring the World of Smartphone Video Lenses
- Built-In Lenses For Smartphone Video Techniques
- Some Extra Clip On Lenses Worth Mentioning
- Master the Art of Editing Your Smartphone Video
- Sound Quality Matters When Recording Videos With Your Smartphone
- Engage with Your Audience
- Conclusion For Smartphone Video Techniques
- Frequently Asked Questions
- Why are smartphone videos so popular now?
- How does smartphone videography compare to traditional filming?
- What are the best apps for smartphone video editing?
- Do I need to invest in external equipment for smartphone videography?
- Which smartphones are best for video creation?
- Is there a difference between iOS and Android mobile devices for videography?
Introduction To Smartphone Video Techniques
In today’s digital age, smartphone video creation transformed from a hobby to a profession. A lot of amateur videographers are now professional video content creators. With the accessibility and increasing quality of smartphone cameras, everyone has the potential to shoot professional quality video. But, what does it take to create the perfect smartphone video? I’ll share some of my experience and 7 tips for shooting video footage with you below.
Using A Smartphone For Video Recording
Smartphone video camera popularity has increased substantially. Almost every smartphone has at least two built in cameras. They’re used to take photos and videos from the scenes in front of you or for selfies. More expensive models have multiple cameras for each situation. Cameras for macro photography, landscape photograph and even astrophotography. Today, even professionals use mobile phones to compliment their work. Their secret? A combination of technique, knowledge and the right tools. Using your smartphone for filming videos is convienent but you still need to understand your phone camera and what makes it tick.
Techniques to Master Smartphone Videography
Understanding Your Smartphone Video Filming Capabilities
Every smartphone boasts different camera specs and features. Before shooting your first video, understand your device. What strengths and weaknesses does it possess? Does the smartphone shoot video in 4K or just High Definition (HD)? What apps are currently installed for the camera features? Learning your smartphone features enables you to shoot better videos. Below I have provided some of what I call “must have” settings in no particular order.
Important Video Settings For Your Smartphone Camera
Resolution: Choose the highest resolution available, preferably 1080p (Full HD) or 4K (Ultra HD). The higher your resolution the sharper and more detailed videos you record.
Frame Rate: Opt for 24, 30 or 60 frames per second (fps) for smooth motion. A higher frame rate like 60 fps is ideal for capturing action. While 24 fps provides a cinematic feel. Match the frame rate to your style of shooting video.
Exposure and Focus: Many mobile phones provide manual control mode to change exposure and focus. Adjust exposure to control brightness and focus to ensure your subject is sharp. Tap on the screen to focus on a specific area and adjust exposure as needed.
White Balance: Set the white balance based on your shooting environment – daylight, cloudy, indoor lighting, etc. This ensures accurate colors in your video.
Color Profiles: If available, choose a color profile like “Neutral” or “Flat.” These profiles preserve more detail in highlights and shadows. Which provides flexibility during editing later on.
Gridlines: Enable gridlines to help you compose your shots using the rule of thirds. This helps improve the visual balance.
Video Stabilization: Turn on electronic or optical stabilization to reduce shaky footage. This is useful if you have to shoot handheld.
Bitrate: If adjustable, increase the bitrate for higher video quality. A higher bitrate results in less compression and better detail retention.
Slow Motion and Time-Lapse: If your smartphone supports it, enable these modes for creative effects. Slow motion captures details in action, while time lapse condenses time.
Format: Select a file format that works with your editing app. Most mobile phones record videos in standard formats like MP4 or MOV.
In Conclusion
Learning these essential video settings on your smartphone, will equip you to capture professional looking footage. Footage with the right resolution, frame rate, exposure and focus sets the stage for impressive video content.
One more thing: optimize your smartphone’s storage and battery. Video recording consumes both, so free up space and carry a power bank for longer sessions.
Optimal Lighting is Key For Smartphone Videography
No matter how advanced your smartphone is, poor lighting can ruin your video’s quality. Learn about the golden hour, taking advantage natural light and when necessary, using external light sources to enhance clarity and mood.
Optimal lighting is important if you want exceptional smartphone videography results. The right lighting enhances the visual appeal of your videos. And it ensures clarity, color accuracy and overall professionalism.
The most valuable asset in a filmmaker’s toolkit is natural illumination. Shooting outdoors during the “golden hours” (shortly after sunrise and before sunset) provides soft, flattering illumination. Cloudy days offer diffused light that minimizes harsh shadows.
Indoors, position your subject near windows to capitalize on natural light. If that’s not feasible, invest in soft LED lights or ring lights designed for smartphone use. These accessories provide consistent distributed illumination that minimizes unwanted shadows.
Avoid strong backlighting, as it obscures your subject. When shooting against a bright background, use the smartphone’s exposure compensation or tap the subject to adjust exposure settings.
Experiment with different lighting setups to determine what works best for your intended video narrative. Remember, proper lighting not only showcases your subject but also sets the tone and mood of your video. The end result is an exceptional quality video recording.
Stabilization Improves Your Video Quality
Stabilization is critical in improving the quality of smartphone videos. Smooth and steady video footage looks more professional and keeps viewers engaged while reducing visual discomfort.
Smartphones offer various stabilization options to help counteract shaky camera movements. Optical stabilization (OIS) and electronic stabilization (EIS) are two common techniques. OIS physically adjusts the camera’s lens to compensate for movement, while EIS digitally processes frames to reduce jitter.
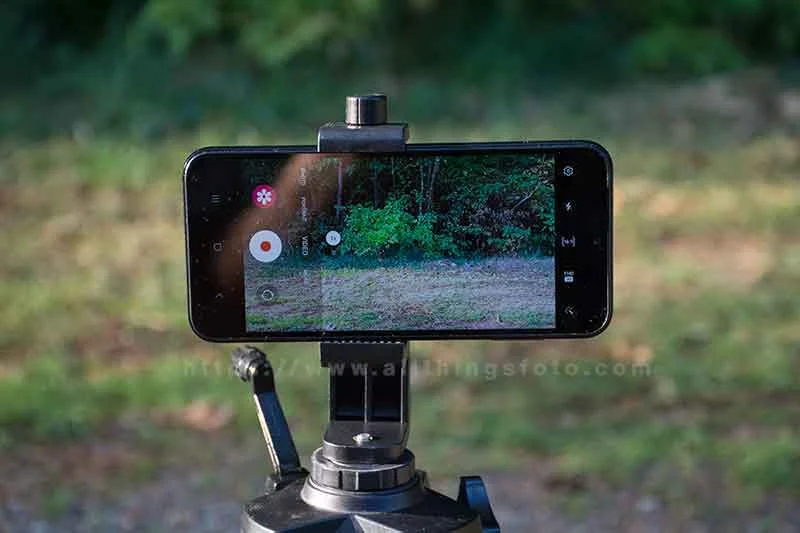
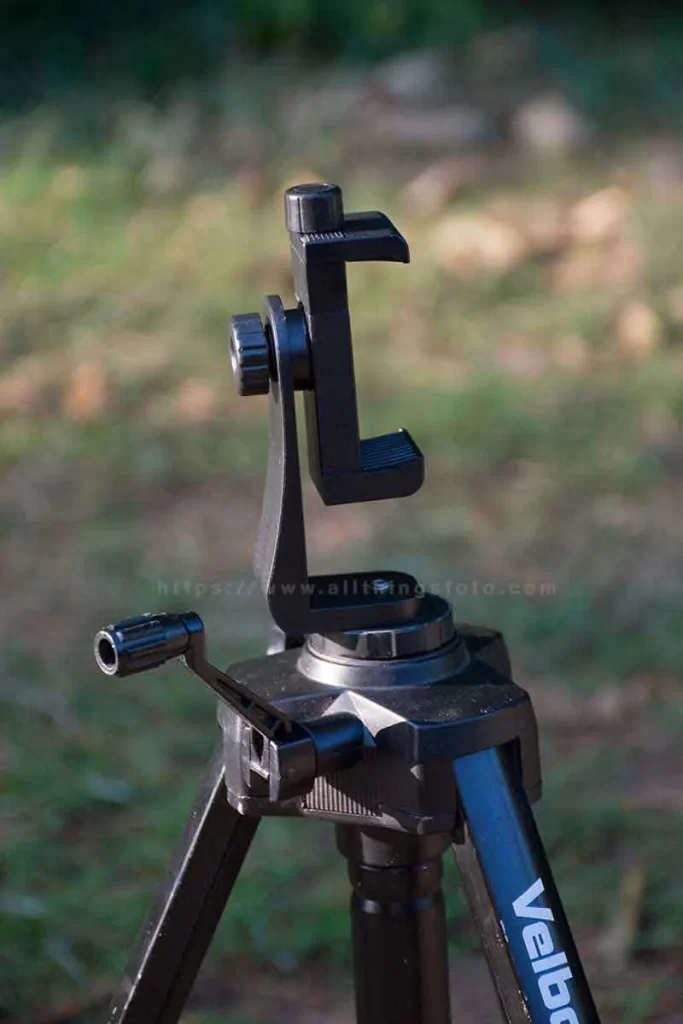
Consider using stabilizers, gimbals or “Do It Yourself” (DIY) hacks to make sure your videos are steady and professional. Built in image stabilization is a feature you shouldn’t overlook. A tripod adapter is a good investment. It allows the use of a monopod, selfie stick or tripod. You’ll find your video quality improves ten fold using a tripod. These tools minimize unintended movements and allow smoother panning and tracking shots.
When filming handheld, ensure a solid grip and avoid sudden jerks or movements. Walking shots benefit from a slow and deliberate pace to reduce motion blur. Try to use optical zoom instead of digital zoom when you can to avoid resolution loss, camera shake and motion blur.
Optical zoom is available on both Android and Iphone video cameras which incorporate multiple lenses. Digital zoom is also available on most smartphones. To use digital zoom pinch or slide your fingers on the screen. Keep in mind, digital zoom crops the image and enlarges it starting at the center of the frame. Use it only when necessary as your image results in a pixelated and noisy enlargement.
For action shots or scenarios where stabilization tools aren’t available, film in slow motion mode. Slowing down footage helps mitigate the shaky movements.
Try these stabilization techniques to improve the quality of your videos. It creates a professional look, making your content more enjoyable and easier on the eyes of your audience.
Exploring the World of Smartphone Video Lenses
Smartphone cameras offer different built-in lens options depending on the price you want to pay. Most come with two built-in lenses for photos and selfies. Advanced smartphone cameras offer multiple built-in lenses.
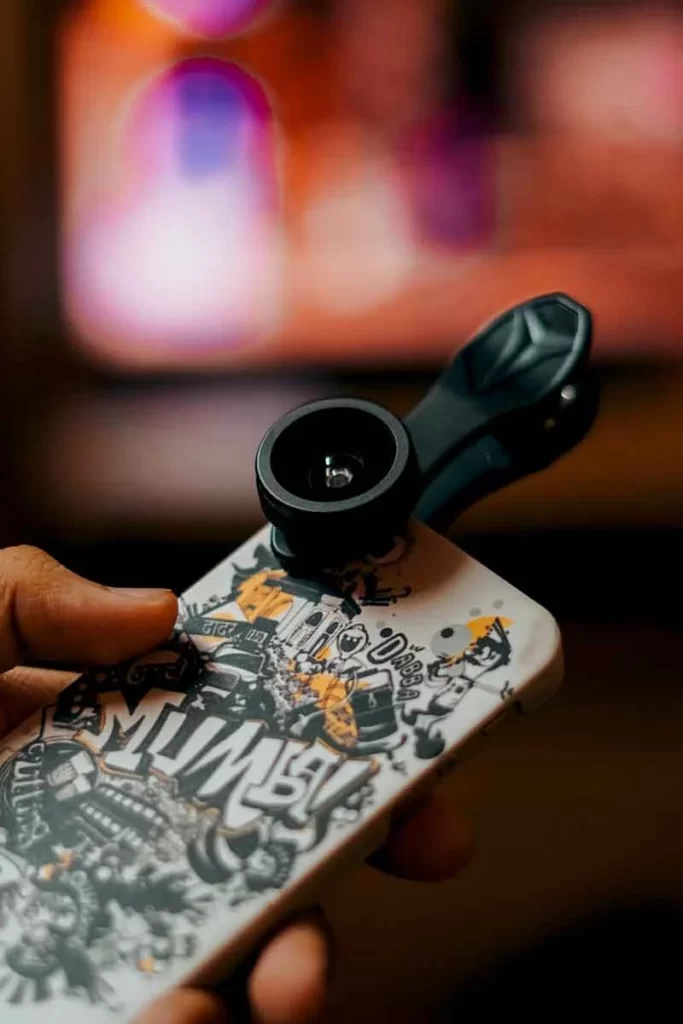
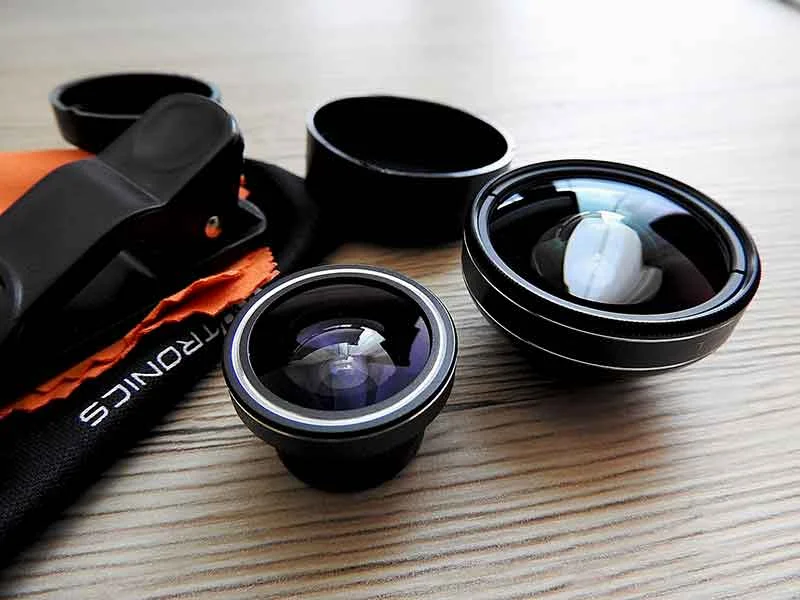
Clip-on lenses that attach to your phone’s camera are available to enhance its capabilities.
Clip-on lenses are compact, portable and affordable alternatives to an expensive smartphone. They offer the flexibility to experiment with different perspectives and styles. Making them a popular choice among smartphone photographers and videographers seeking to push their creative boundaries.
Below I have listed some of the popular choices for both built-in and clip on lenses.
Built-In Lenses For Smartphone Video Techniques
Wide Angle Lens: This lens is perfect for capturing landscapes, group shots and architectural wonders. It enables you to fit more into the frame without having to back up. A wide angle clip on lens is also available for your standard lens. Similar to the built-in wide angle lens, clip on wide angle lenses provide an even broader field of view. They’re great for panoramic shots and capturing expansive landscapes.
Telephoto Lens: With this lens, you zoom in on distant subjects without compromising image quality. It’s ideal for wildlife photography, sports events or any situation where getting close to your subject is difficult. Clip on telephoto lenses allow you to achieve zoomed in shots without sacrificing image quality. They’re handy for getting closer to distant subjects.
Macro Lens: A macro lens brings small details to life. Allowing you to shoot stunning close-up shots of flowers, insects or intricate textures. It reveals a world not easily visible to the naked eye. Clip-on macro lenses also provide stunning close-up shots. Perfect for capturing intricate textures, tiny plants or even detailed shots of jewelry with your standard camera lens.
Ultra-Wide Lens: The ultra wide lens provides broader perspectives compared to the standard wide angle lens. It’s fantastic for capturing immersive scenes and dramatic architectural shots.
Fish-Eye Lens: This lens creates a distorted, circular perspective. Which adds a creative and unique touch to your images. It’s used for experimental or artistic photography. Fish-eye clip-on lenses provide the same effects as their built-in counterparts.
Portrait Lens: The portrait lens is optimized for capturing people. It produces a shallow depth of field that blurs the background, making the subject stand out.
Low Light Lens: Some smartphone cameras feature lenses designed for low light conditions. These lenses capture clear, well-lit photos and videos in challenging lighting situations.
Some Extra Clip On Lenses Worth Mentioning
Anamorphic Clip-On Lens: Anamorphic lenses create a distinct cinematic look. Which produces horizontal lens flares and a widescreen aspect ratio. They’re popular among filmmakers looking to add a cinematic touch to their videos.
Polarizing Clip-On Lens: These lenses (filters) reduce reflections and glare from surfaces like water and glass. Which enhances color saturation and improves image quality.
Wide Macro Clip-On Lens: This type of lens combines the benefits of wide angle and macro lenses. Allowing you to capture more context while still getting up close to your subject.
Clip on lenses for smartphones provide extra options. From fisheye to macro, there’s a lens for every need. Learn to use them for different situations and add depth to your videos.
Master the Art of Editing Your Smartphone Video
Recording a video is only the begining. Use post production tools to clip, fix mistakes or splice frames in your videos. Whether color grading, cutting or adding effects, editing elevates your smartphone video to professional quality video levels.
Editing your smartphone videos is important before showing them to your audience. The editing process fixes mistakes, improves the narrative and increases attention to your videos. You have the ability to transform a weak video into a strong one during editing.
Begin by selecting a reliable video editing app for your smartphone. Numerous apps offer a range of features for your smartphone camera. Features like basic trimming, advanced effects and transitions. After choosing your camera app, familiarize yourself with its interface and tools.
Trimming and cutting are techniques that remove unwanted segments. Use transitions like fades, cuts and dissolves to connect scenes. Experiment with effects, filters and color correction to enhance visual appeal and consistency. Editing with these smartphone video techniques with your camera app or editing software gives your video a smooth flow.
Pay attention to pacing. Adjusting the timing of clips maintains engagement and matchs the video’s tone. Incorporate text overlays or subtitles to convey information.
Music and sound effects when used correctly set the mood in your video. Choose audio that complements the video’s narrative and evokes emotions.
Keep the audience in mind when creating your video. Videos for social media require shorter, punchier edits. Longer content demands a narrative approach.
Save your work often and experiment with different edits. Remember to seek inspiration from other videos or tutorials to enhance your skills.
Editing smartphone videos enhances storytelling, adjusting visuals and harmonizing audio-visuals. With a little creativity and practice, your smartphone video techniques improve over time. If you use these techiques you should produce exceptional quality videos.
(Affiliate Link)
Sound Quality Matters When Recording Videos With Your Smartphone
Recording with poor audio quality diminishes the video’s impact. Crisp, clear audio strengthens the narrative, keeping the audience interested. An external recording device (external microphone), soundproofing or listening for potential digital noise in your surroundings makes your video stand out.
To ensure optimal sound quality, I recommend the following tips:
Quiet Environment: Choose a quiet setting to minimize background noise. Loud and distracting sounds detract from your message. If filming outdoors, avoid windy areas that create unwanted noise.
External Microphones: Invest in an external recording device designed for smartphones. Directional microphones capture sound from the intended source. Which reduces ambient noise. Lavalier (lapel) microphones are great for interviews or presentations.
Positioning: Place the microphone close to the sound source for clearer audio and less digital noise. For instance, if recording an interview, attach a lavalier mic to the speaker’s clothing.
Post Editing: If your smartphone video app allows separate audio tracks, than record audio separately on a voice recording app. After which you sync the improved audio with the video during editing.
Audio Editing Software: After recording, use audio editing software to improve sound quality. Tools like noise reduction, equalization and volume normalization improve audio clarity.
Music and Sound Effects: Add background music or sound effects to enhance the video’s mood. Ensure they complement the visuals without overpowering the dialogue.
Voiceovers: If the original audio quality is poor, try re-recording voiceovers. Allowing you to replace faulty audio sections without compromising the actual video.
Test and Adjust: Before filming, perform audio tests to ensure levels are optimal. Monitor the sound while recording to catch issues early.
Paying attention to sound quality during recording and using post editing techniques, makes your smartphone videos stand out. If your mobile phone video camera recording has poor audio quality you need to fix it in an app or editing software.
Engage with Your Audience
Engaging your audience elevates creates a lasting impact. When building a strong connection with viewers boosts their interest, encourages them to interact, share and return.
Here are some effective ways to engage with your audience and maintain their interest:
Compelling Intro: Begin with an attention-grabbing introduction that piques viewers’ curiosity.
Clear Message: Clearly communicate your message or story. Poor communication doesn’t address the viewers interests or needs.
Visual Variety: Keep the visuals dynamic by incorporating different shots, angles and visual elements.
Storytelling: Create a narrative that your audience understands. Stories evoke an emotional response making your content memorable.
Interaction: Encourage viewers to engage by asking questions, conducting polls, or requesting comments. Respond to their interactions to foster a sense of community.
Call to Action: Provide a clear call to action, whether it’s subscribing, liking, sharing or visiting a website. Your click thru rates and sales will thank you.
Use Humor and Personality: Inject humor and showcase your personality. Relatable and authentic content is more likely to resonate and keep viewers engaged.
Visual and Audio Quality: Ensure high quality visuals and clear audio. High quality video content shows a better viewing experience.
Consistency: Maintain a consistent posting schedule. Regular updates keep your audience coming back to see what is new.
Feedback and Adaptation: Pay attention to viewer feedback. Use this feedback to adapt your videos to their interests and needs.
Surprise and Delight: Occasionally introduce surprises or unexpected elements. Your viewers curiosity keeps them interested.
If you use these tips to connect to your audience you’ll build a lasting relationship. Valuable visual content cultivates loyalty and impactful smartphone videos. Whether you shoot iphone video or android video you need to keep your audience engaged.
Conclusion For Smartphone Video Techniques
The world of smartphone video creation is big and always evolving. A poor video making technique is something you want to avoid. With the right techniques, tools and passion, anyone has the ability to shoot great videos. If possible always try to record high definition video. Don’t forget to use the rules of photography like f/8 and be there, frame your composition, rule of thirds, sunny 16 rule and the golden hour. These tools will improve your video making skills.
I hope you have learned some smartphone video techniques that will serve you well for your next filming session. Maybe some of you will become professional video content creators that started with your smartphone. Remember, you must first have a camera with you and smartphones provide many benefits other than calling. So, pull out your smartphone and let the filming begin!