- Significance of Camera Lens Filters for Newbie Photographers
- Types Of Filters For Your Camera Lens
- UV Filters: Lens Protector And Other Uses
- Using Polarizing Filters: Enhancing Clarity and Strong Coloration
- Color Filters: Improving the Tones of an Image
- Neutral Density (ND) Filters: Mastering Light Control
- Graduated Neutral Density Filters (GND): The Exposure Balance In Landscapes
- Infrared (IR) Filters: Unmasking the Invisible Spectrum
- Soft-Focus Filters: Exuding A Dreamy And Romantic Glow
- Star Filters Create Mesmerizing Effects By Capturing Light Flares
- Close-Up Filters (Macro Filters): Showing A Small World
- Diffusion Filters: Creating Soft And Romantic Imagery
- FLD (Fluorescent Light Daylight) Filter
- Filter Sizes And Compatibility: A Perfect Fit Every Time
- Mounting And Removal Of Filters: With Care And Precision
- Premium-Class Filters vs. Budget Options: The Right Choice
- Practical Tips And Techniques: Using Filters Like A Pro
- Summarizing This Guide To Filters For Cameras
Significance of Camera Lens Filters for Newbie Photographers
Photography is not just a matter of clicking the shutter, but an art dedicated to capturing moments, drama and stories through the eye of the camera. Using camera lens filters is essential in boosting and manipulating the images you create in the course of this creative adventure.
Whether you are a beginner in photography or looking to enhance your skills, understanding and mastering camera lens filters can be that first step required not only to know how to click the camera but also to venture into the photographic journey.
This guide is a full beginners guide to camera lens filters and how important they are as an aspect in photography. Filters are such essential part of your image-making process, providing appealing creative options as well as practical advantages to your shots. They help in controlling light, reducing reflections, enhancing colours, as well as producing dramatic effects that would seem impossible in post-processing.
In this guide, I am going to take you through an introduction to camera lens filters whose purpose and types, as well as uses, will be clearly stated. From purpose of UV filters for lens protection to the use of polarizing filters to make the landscapes pop, to neutral density filters for exposure control, to creative color filters to show your inclination towards art, you’ll know all of it.
By the end of this tutorial, not only will you know what camera lens filters are all about, but how to select the right lens filter to enhance your image. So, let’s take this enlightening journey of camera lens filters specifically crafted towards beginners.
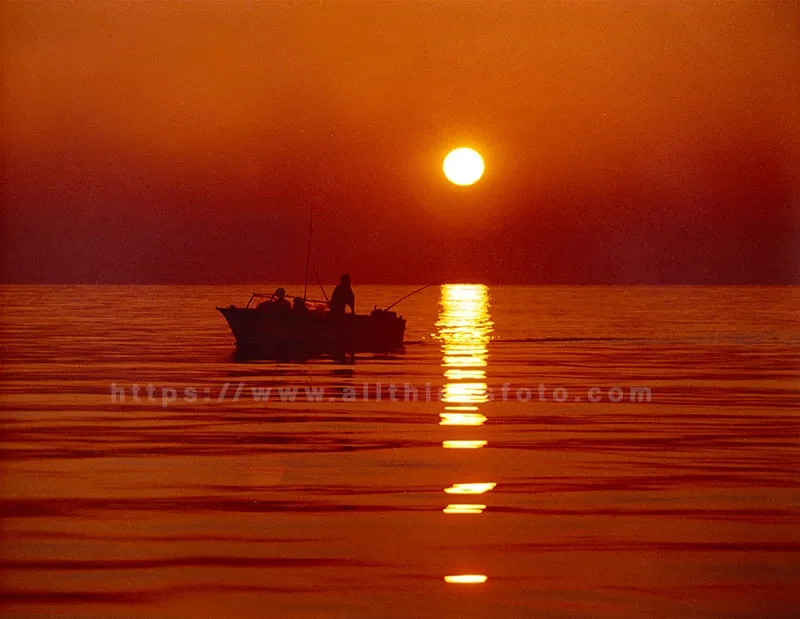
Types Of Filters For Your Camera Lens
Camera filters come in many varied types with diversified purposes and benefits. There are circular filters, rectangular filters and square filters. A Filter holder is used for rectangular and square filters. These filters are slid into the filter holder while circular filters are screwed onto threaded lens. Understanding each filter’s function is imperative in shaping up your photography goals.
In this guide I will focus on circular filters. Here are the main circular types:
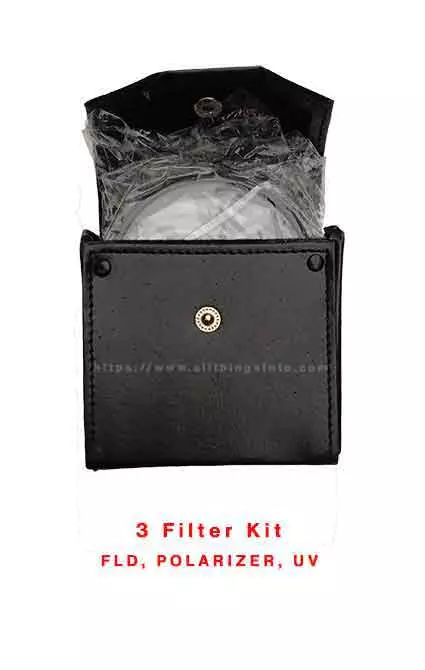
UV Filters: Lens Protector And Other Uses
What Is A UV Filter
Think of a UV lens filter, (Ultraviolet) as a clear protector for your camera lens. Say goodbye to UV light passing through the camera sensor with these camera lens filters. UV light is not visible to our eyes, but produces a bluish haze on the photograph. Especially at high altitudes or where the day turns out to be exceptionally bright and sunny.
How Does A UV Filter Act As A Protection For Your Camera’s Lens
UV filters can be compared to a kind of a protective shield for the lens of your camera. They provide protection to the lens from all sorts of damage like scratches, dust, moist for that matter and also against fingerprints. In this role, they act like a sacrificial layer – absorbing any form of impact or debris that may be harmful to the lens. For this reason, in most cases, the UV filter is referred to as “lens protectors.”
Are The UV Filters Necessary For Digital Cameras
The book is still out whether a UV filter is necessary for digital cameras. Thanks in large part to their sensors which are less sensitive to UV light. Most professional photographers agree the filters are not needed unless film photography is using traditional emulsion based films.
When used purely for the lens’ protection, UV filters have a very minimal impact upon a final composition or quality of an image. Properly designed and manufactured, UV filters are optically transparent. This means they introduce no noticeable distortion or color shift. However, it’s crucial to invest in a good-quality UV filter to minimize any potential degradation in image quality.
Professional photographers prefer using a lens hood and careful handling to protect their lens. Especially if a high quality image is the goal.

Using Polarizing Filters: Enhancing Clarity and Strong Coloration
What Are Polarizing Filters And How Do They Work
A polarizer or a polarizing filter is an optical accessory attachable to a camera’s lens. It selectively filters out polarized rays reducing reflected light from opaque surfaces encountered in photography and increasing saturation of color. This type of lens filter has two main parts: the outer ring, to attach it to the lens and an inner rotating lens element, which adjusts the amount of polarization.
What Are The Actual Uses Of Polarizing Filters For A Photographer
Polarizing filters are about as versatile as a lens tool gets, across all of photography. In broad terms, they’re used to help:
When properly oriented, a polarizing lens filter can help in blocking the way some polarized light waves produce reflections. The polarizing lens filters thus cut and reduce the reflections such that you can see through glass or even water. Thus taking better quality pictures without the distractive influence cause by brightness from the glare.
Polarizing filters also boost color saturation by removing scattered light to leave you with images full of much vibrancy and natural colors. This effect is especially useful when photographing landscapes, as it intensifies the hues of the sky and surrounding objects.
Polarizing filters are really convenient attachments that assist a photographer in ensuring reflections are controlled. By doing so you capture vibrant images that catch your eye. Understanding how to use them appropriately will certainly work to improve your image outcome.
Color Filters: Improving the Tones of an Image
What Are Color Filters And How Do They Affect Colors In Your Pictures
Filters that change the color of light passing through the lens are called color filters. A color filter transmits the colors for which it is designed while blocking other colors. They can be used to correct color imbalances in the various lighting or even create artistic effects by enhancing or altering colors in your photos.
Some color filters also come as a graduated filter meaning they are split in two with the color on one half and transparent on the other. Works well in bright situations where a graduated Neutral Density filter isn’t need if you want to add color to the horizon or sky etc.
Color filters offer a photographer a flexible toolkit that allows them to make color corrections and add an artistic tang to their photographs. Knowing when and at what time to use such filters may affect the mood and feel of your photography.
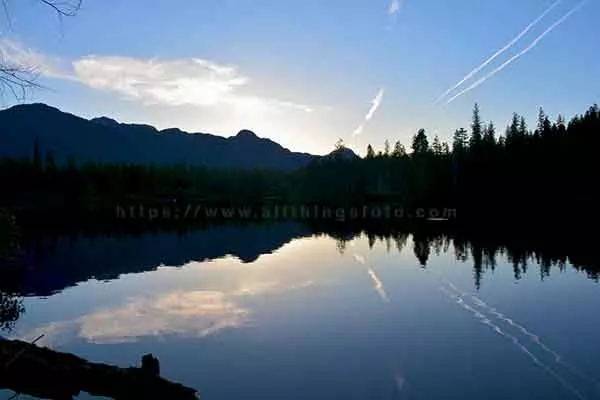
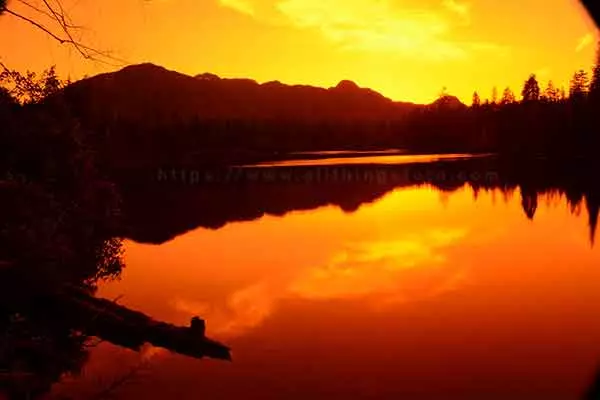
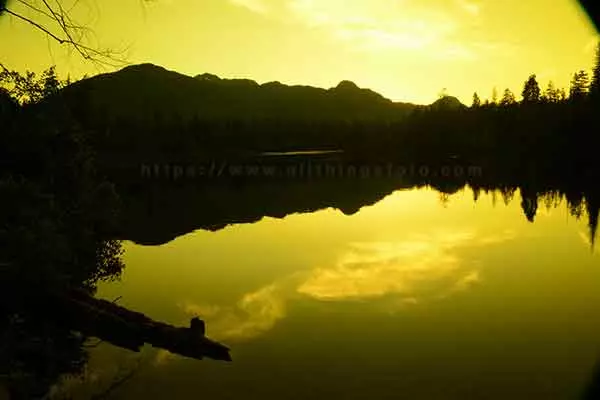
Check out the images below using different color filters to illustrate their effects. I shot these photo a long time ago when I was experimenting with filters. Can you spot a mistake I made with the filtered images (think lens hood)? Make sure your lens hood works with filters or is in the corrent position on the lens.
The first is the original photo taken with no filters.


Neutral Density (ND) Filters: Mastering Light Control
What Is A Neutral Density (ND) Filter And Why Would A Beginner Need One
An ND filter is like sunglasses for your camera, cutting down light without messing with colors. ND filters are a beginner’s best friend for controlling exposure and creating cool effects in bright conditions. I like to use nd filters a lot when bright light washes out my landscape scenes. I find nd filters add more vibrancy to my colors in a forest or to flowers on a sunny day.
How Does An ND Filter Work In Managing Exposure And Yield Longer Shutter Speeds
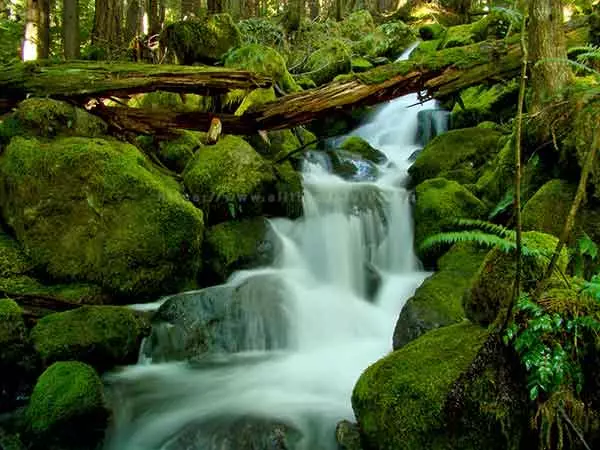
An ND filter carries out its function by uniformly reducing the intensity of all wavelengths of the light passing through them. Since the ND filter restricts how much light is allowed to enter the camera sensor, this then allows photographers to use slower shutter speeds or wider apertures even in broad daylight. This effect becomes most handy when trying to create effects such as motion blur in waterfalls or silky smooth clouds in long exposure landscape shots.
An ND filter is handy for the following:
With ND filters in their kit, photographers unlock endless possibilities for light control and captivating photos. If you’re a beginner, getting the hang of ND filters will unlock a world of creativity in your photography.
Graduated Neutral Density Filters (GND): The Exposure Balance In Landscapes
What is Graduate Neutral Density (GND) Filter
In the world of photography, a graduated nd filter is distinctive, with a gradient of darkness from clear to gray. It’s all about balancing exposure in scenes where the sky and the foreground differ significantly in brightness. GND filters make bright areas darker and keep darker areas as they are, ensuring both the sky and ground are well-exposed in landscape shots.
Can A Graduated Neutral Density (GND) Filter Help Protect Your Camera Lens
In contrast, GND filters are not designed as protective lenses like the UV filters. They mainly function as exposure control creative tools. Although a GND filter may indeed offer a certain degree of physical lens protection, even protecting the front lens element against light scratches and small debris they were not designed specifically for those applications.
Is A GND Filter A Necessary Tool For A Digital Camera
Depending on your photography style and preferences, GND filters may not be essential for all digital cameras. However, they have great value to landscape photographers or those who would want to capture scenes with large brightness differences between the sky and the foreground.
GND filters enable implementing a well-balanced, dynamic landscape photograph which becomes often impossible without GND filters. I personally love them for this reason and they work well in this situation.
Infrared (IR) Filters: Unmasking the Invisible Spectrum
What Are Infrared (IR) Filters And How Do They Work
Simply speaking, Infrared (IR) filters allow infrared light to pass through without allowing visible light to pass. It achieves this by filtering out all the elements of the visible spectrum and only allowing wavelengths having infrared qualities to reach the camera sensor. This unique form of filtration gives rise to unique images that have surreal and characteristic attributes beyond our human visual capacity.
Practical applications where one can use Infrared (IR) Filters in photography:
Infrared filters lend a different and artistic perspective which takes the photography to another level. The choice of using the IR lens filter is determined exclusively by your creative vision and in-depth exploration of the hidden infrared spectrum.
For photographers seeking a unique and artistic touch, infrared filters are essential. They have a significant impact on the final composition, introducing surreal colors and rendering subjects in a distinct way compared to standard photography. IR filters shine when used for creative effects, adding an artistic and dreamy quality to images that sets them apart and captivates the viewer. Many photographers deliberately select IR filters for their transformative effects, which open up opportunities for unconventional and imaginative compositions
Soft-Focus Filters: Exuding A Dreamy And Romantic Glow
This special lens filter adds a soft, dreamy and romantic appearance to photographs. Their design aims to diminish sharpness and create a soft, diffused effect by scattering incoming light within the camera. Soft-focus filters find common use in portrait photography, adding a flattering and ethereal touch.
Some different applications for soft-focus filters:
These filters lend a soft and flattering quality to images, though in most cases they are associated with specific genres like portraiture and fashion photography. Some photographers may take into consideration the dreamy effect they provide and opt to have soft-focus filters in their kit.
Soft-focus filters are the artist’s brush, helping photographers create a distinct mood and style in their shots.
Star Filters Create Mesmerizing Effects By Capturing Light Flares
A Star Filter is attached to the front part of a camera lens in order to produce beautiful starburst or cross-star patterns from bright points of light within a scene. These filters have a pattern of useful lines or ridges attached to their surface, and that is responsible for the diffraction of light into star-like patterns. Star filters find more use on nighttime cityscapes, Christmas lights and other scenes with important sources of light.
Star filters are popular in the following types of photography:
Close-Up Filters (Macro Filters): Showing A Small World
Close-Up Filters, sometimes called Macro Lens Filters, are screwed on the front of a lens to allow macro photography or close-up photography, usually using an outdoor setting. These lens filters act as magnifying glasses for your camera lens, that make it able to focus on the objects at much closer distances than your lens’s standard minimum focus distance.
Close-Up Filters are versatile tools, which have a wide range of applications:
Close-up filters offer a pocket-friendly alternative to expensive macro lenses that help you step into the world of smaller subjects without purchasing additional equipment.
Close-Up Filters create an intense effect on the final composition with their use in close-up photography because the lens filter provides sharp focus on small subjects and reflect the smallest details. They add greater depth, texture and even sometimes intimacy to your images that give you the opportunity to explore the hidden beauty of its miniature world. Close-Up Filters are used by photographers looking to create graphic interest and visual impact in their compositions, especially taking close-up photos of small subjects.
Diffusion Filters: Creating Soft And Romantic Imagery
A Diffusion Filter is similar to a soft-focus filter and used in photography for the purposes of impressionism. It works by creating a romantic or a soft, dreamy effect by scattering light as it enters the camera. These filters are made to reduce sharpness as well as contrast, creating a gentle appearance. Typically diffusion filters are used to enhance flattering and atmospheric looks on portraits and fashion photography.
Some of the uses of diffusion filters In photography include:
The use of diffusion filters brings a distinctive and romantic quality to images, enhancing both mood and aesthetics. Achieve a specific style, ambiance, or storytelling in your photos with the deliberate use of diffusion filters, as photographers often do.
FLD (Fluorescent Light Daylight) Filter
An FLD lens filter fixes color balance under fluorescent lights. Fluorescent lights cast green or blue hues, affecting photo colors. FLD filters are handy for fluorescent-lit interiors.
How they work:
FLD filters are available in various sizes and can be attached to the front of your camera lens like other filters. They are most effective when used in conjunction with the specific type of fluorescent lighting you are shooting under. Overall, FLD filters help photographers maintain accurate, lifelike colors in fluorescent settings.
Filter Sizes And Compatibility: A Perfect Fit Every Time
A perfect fit of the lens filter size for your camera lens is needed to ensure the excellent benefits of using camera filters. Usually, the size of the filter is indicated at the front of your lens and is likely to be in millimeters (mm). To know what size is appropriate for your camera lens filter used, check either your lens specifications or look out for labels such as “Ø” followed by a digit on the lip of the lens barrel.
Filter thread size is the equivalent to the lens’ diameter where filters are attached. For example, with a 52mm filter thread lens would require a 52mm filter. However, the filter thread size may be different depending on what lens is in use, hence checking each lenses requirement is important.
Step-up and step-down rings are useful attachments that maintain compatibility of filters with a variety of lenses. Therefore, step-up rings enable larger filters to fit smaller thread sizes, while step-down rings allow smaller filters on a larger threads. Say goodbye to the need for multiple filters with these rings, as they offer both flexibility and cost-efficiency for different lenses.
Make sure that filters are compatible with your camera and lens. A number of lenses have protruding elements that can interfere with the mounting of filters. It’s worth noting that particular camera systems could require their own filter systems. Check compatibility before purchasing any filters and always get high-quality filters that match your equipment.
Mounting And Removal Of Filters: With Care And Precision
Affixing filters correctly is important for maintaining the quality of your images as well as the durability of your equipment. See how it’s done properly:
Fitting Filters:
- Fitting filters: Ensure that your hands are clean and dry to avoid leaving fingerprints or smudges on the filter. Align the threads of the filter with the lens threads, turning it gently clockwise until it fits snugly. Do not do it too tightly as this can make removal difficult.
- How to remove a filter: Turn the filter counterclockwise with a steady, controlled motion. If it’s stuck, avoid excessive force to prevent damage. If a filter is challenging to remove, use a filter wrench or a rubber jar opener for added grip. Be cautious not to overtighten these tools.
- Cleaning and maintaining your filter: Regularly clean your filters with either a microfiber cloth or lens cleaning solution to rid them of dust and smudges. Do not use abrasive materials to clean them. We recommend storing filters in protective cases when not in use to prevent scratches and damage.
- Handling Tips: Control filters by the edges so as to prevent contact with the glass. Blow or brush the loose debris from the filter prior to cleaning so as not to scratch the surface. Store the filters without handling them in a dust-free area. If handled properly, filter care should allow you to maintain image quality and prolong the life of your photographic equipment.
Premium-Class Filters vs. Budget Options: The Right Choice
When it comes to camera filters, you’ve got a bunch to pick from, including budget-friendly and high-quality ones. These differences matter, especially for beginners trying to make informed decisions.
Cheaper Filters For Budget Conscious Beginners
Cheaper filters are cost effective and best for beginners who work under limited finances. They act as basic protectors, and will help teach you how filters affect compositions.
Just a heads-up, these lens filters might not give you the best results, potentially causing distortion, color changes, or less sharpness in your shots. If you find this to be true, try saving for a more expensive and better quality filter.
Premium Filters For More Serious Beginners
The good stuff goes into premium lens filters: high-quality glass, special coatings, and a lot of precision. You can count on these filters for top-notch clarity without messing up your images. On top of that, they’re often sturdier and less susceptible to scratches.
Expect to pay more for premium lens filters. However, if you can afford it the end results justify the means.
Summarizing Budget Friendly Or Premium Filters
A beginner or even a tight-budgeted aspiring photographer would be okay to go only for budget-friendly filters. Especially with the various types out there until you understand how each one affects your composition. You may want to upgrade into high-quality filters once your skills and demands increase. Think of your priority—cost saving versus top-of-the-line image quality.
It may be a good idea in the long term to invest in filters of superior quality that are able to greatly improve your shots and preserve the performance capability of your lens. Especially if you plan on jumping right into professional work or using high resolution cameras.
For beginners, however, affordability is preferred when experimenting with them in an effort to learn their use while still yielding acceptable results.
Practical Tips And Techniques: Using Filters Like A Pro
Using camera filters effectively can elevate your photography. Here are some practical tips and techniques, along with common pitfalls to avoid:
- Know Filter Effects: Know the particular effects each filter type will have on your images. Be conscious of how polarizers cut down on reflections, ND filters manage exposure and color filters modify colors. This awareness serves as a building block for achieving the intended results.
- Filter Compatibility: Ensure that the filter of your choice is compatible with the thread size of your lens. Purchase step-up or step-down rings in order to use one filter on multiple lenses.
- Gradual Adjustments: Place the GND filter carefully for a seamless blending of the transition, especially where there is a horizon line in landscapes. Steer away from an abrupt change in exposure.
- Use a Tripod: A tripod is instrumental when it comes to long-exposure shots with ND filters. Especially for a precise composition while minimizing – if not preventing – camera shake, which is crucial to retain image sharpness.
- Post processing along with filter use: Filters can work wonders, but don’t go overboard with them in post-processing. Aim for a sweet spot between what you capture in-camera and what you tweak later.
Common Errors Made By Photographers Starting Out
Below you will find some common errors made by photographers that are easily fixed. Experience is your friend with understanding how filters behave in different situations.
- Overuse of Polarization: Too much polarization may achieve skies that are too dramatic. In this case, moderation becomes key when using a polarizing filter. Take your shot and view it in the live view of your digital camera and adjust as necessary.
- Dirty Filters: Keep your filters clean to ensure good image quality. Carry lens cloth and cleaning solution. I like to clean mine before putting them away and again when using them.
- Inappropriate use of Filters: Avoid using ALL filters all the time. Often there are situations, where filters can only subtract from rather than add to your shots. Color filters come to mind for me as I’ve had many situations where a color filter was used incorrectly and ruined my shot.
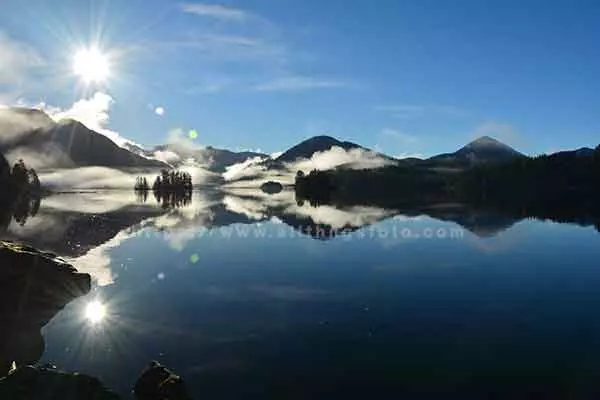
- Leaving behind lens hood: Wide-angle lenses which are using filters can possibly cause undesired flares and reflections, which would have been prevented from the use of a lens hood. Keep in mind some lens hoods don’t allow filters so check first.
- Improper Filter Stacking: Layering multiple filters without considering their combined effects can result in unexpected color shifts or vignetting in photos
- Miscalculating Exposure Adjustments: Failing to compensate for the light reduction caused by certain filters, such as neutral density filters, can lead to underexposed images.
- Incorrect Filter Placement: Attaching a filter incorrectly or not securing it properly to the lens can lead to vignetting, light leaks, or even damage to the filter or lens.
- Using Filters in Poor Conditions: Using filters in extreme weather conditions, like heavy rain or strong winds, without adequate protection can damage both the filter and the lens.
- Forgetting to Check the Viewfinder: Not previewing the effects of a filter through the camera’s viewfinder or live view mode before taking a shot, leading to unexpected results.
- Misjudging Filter Strength: Incorrectly assessing the strength of a neutral density filter, leading to excessively long exposures or inadequate control of light.
Summarizing This Guide To Filters For Cameras
In this guide, we have explored the world of camera filters and how they can revolutionize your photography with particular emphasis on beginners. Here’s a recap to kick you off on your journey.
Familiarize yourself with the kinds of filters: There are many sorts and types of filters available. Such as UV to protect, polarizing to reduce reflections and increase color saturation, neutral density (ND) to manage exposure and color for a variety of creative purposes. Learn their purpose and advantage.
Choosing the Right Filter: To ensure that your filters will fit your camera lenses properly, choose the right filter size based on knowing if the filter thread is compatible and/or purchasing step-up/step-down rings.
Proper Handling: Handle the filters with care as well as making sure they are clean so that image quality is maintained. Keep them protected in cases while not in use. Avoid contact on the surfaces of the glass to minimize getting fingerprints and/or scratches.
Budget vs. Premium Filters: Always consider your budget and of course, the photographic needs while choosing the best lens filters. The budget-friendly ones are perfect for beginners whereas the premium or best lens filters will significantly offer better optical quality and durability combined as well.
Proven Exploratory Tips: Stability by using the tripod on long-exposure shots, GND filter positioning very carefully to make the transitions smoother and keep an eye out for over-polarization. Learning filters depends on experimenting with their usage, feel free to try as many techniques as possible.
More Learning Resources: Look up free online tutorials, photography forums and filter technique books to get acquainted with the world of camera filters. Practice using them when you can, gain experience and accept guidance from professional photographers to perfect your skills.
With the birth of artificial intelligence some cameras now offer features built in that provide different filters for certain situations. This should help with the burden of carrying extra weight by reducing the amount of filters in your bag.
Camera filters open up infinite creative avenues in your photography. Get started by experimenting and discover the magic they add to your images. Be it glorious landscapes, dreamy portraits or an exploration of artistic effects- camera filters are tools that can creatively broaden your perspective on shooting.
If you think I’ve left a filter out or want to know about a filter not discussed in this guide, leave me a comment below. Happy clicking!
